
-
-
Select Record Birth from your ScotMoves+ Home page or from the Record / View data box.
-
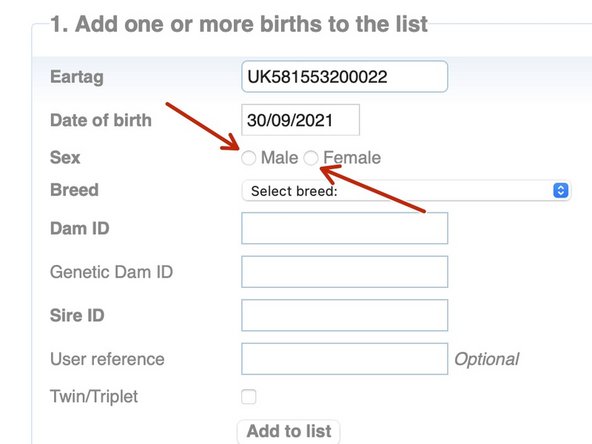
You are presented with the data entries fields that are required to record the birth.
-
Ear Tag ID
-
Date of Birth
-
Sex
-
Breed
-
Dam ID
-
-
-
Start typing at the red arrow in the ear tag field and your unused ear tags appear.
-
A drop down list of your unused ear tags appears.
-
Select the ear tag of the calf you wish to register.
-
Entering the Date of Birth is next. Please click on the entry box and a drop down calendar appears.
-
Select the Date of Birth of the calf by clicking on the date on the calendar.
-
Your calf registration must be submitted within 27 days of birth.
-
-
-
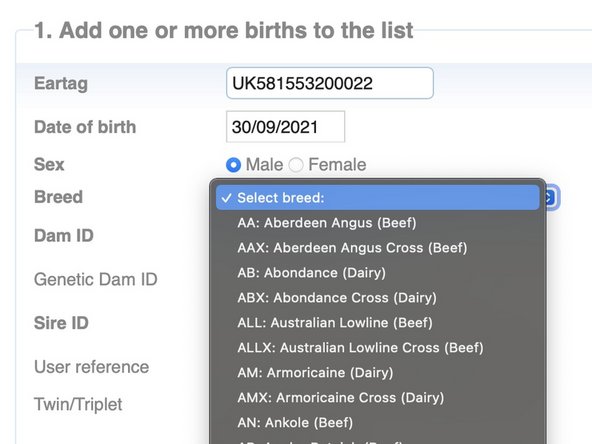
Record the sex of the calf by clicking the Male or Female button.
-
Click 'Select breed' and a drop down appears.
-
Select the breed of your calf by clicking on the breed in the drop down.
-
-
-
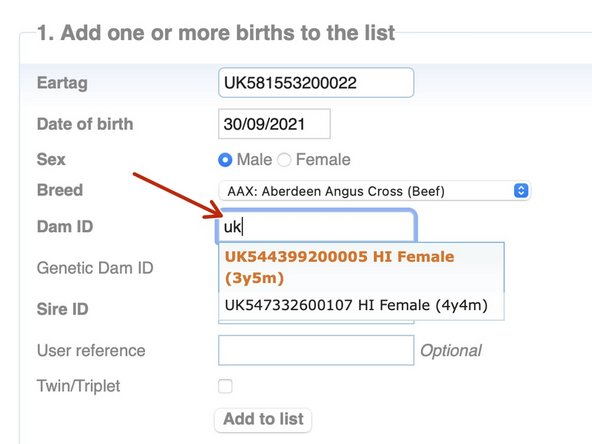
Start typing in the Dam ID box and a list of available cows appears.
-
Select the Dam of the calf from the list.
-
If the dam has calved within the previous 240 days - the message appears ' Dam has already calved' . Please check the Dam ID you have selected.
-
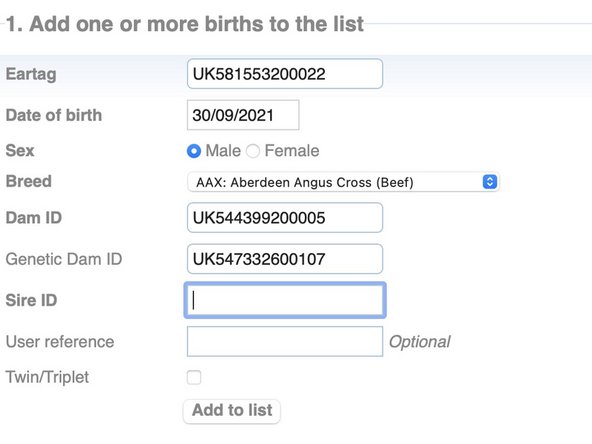
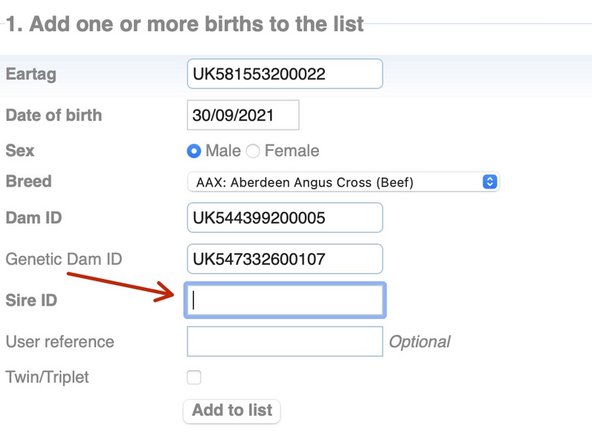
The Genetic Dam can be entered or selected.
-
The Genetic DAM ID is only required to be recorded when an ovum transplant has produced the calf.
-
-
-
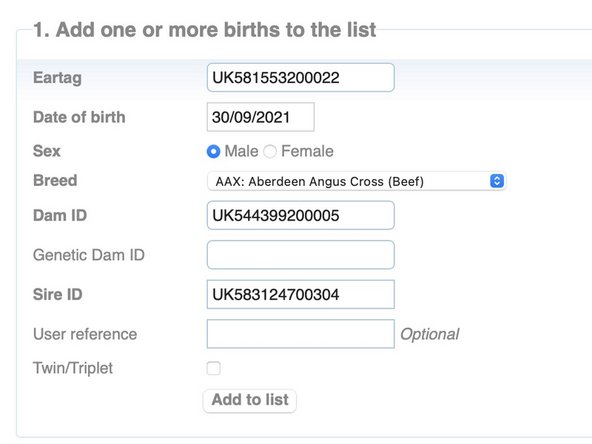
The IDs of bulls on your holding appears in a drop down when you start typing.
-
Please select the ID of the father of the calf.
-
Alternatively, you can enter the bull's name but for trace purposes the ID is preferred.
-
-
-
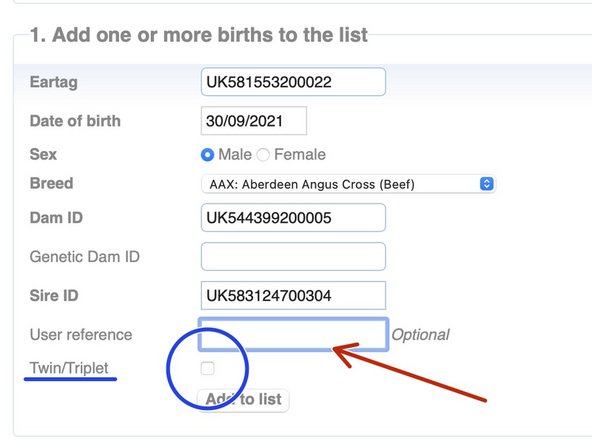
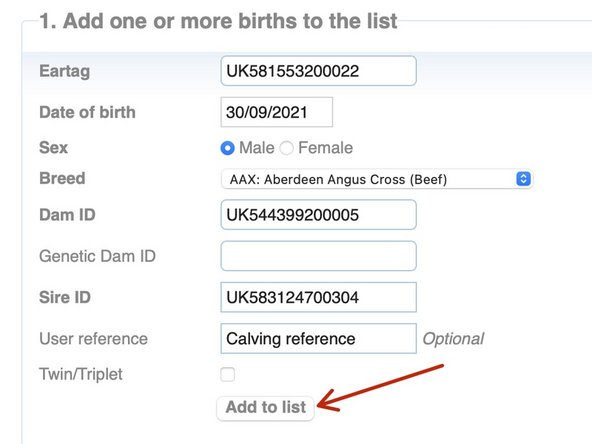
You can enter a reference for the birth.
-
Please note that this is your reference and remains against the animal on your holding details only. It does not transfer with the animal if the animal leaves your holding.
-
For registering the births of twins or triplets please refer to the guide 'Registering Twins or Triplets'.
-
-
-
Click the 'Add to List' button.
-
Your calf registration details are now in Section 2.
-
For checking, editing and submitting your calf registration, please refer to the guide 'Submitting your calf registration'.
-
-
-
As you add to the list, each calf appears in Section 2 for you to review the details.
-
This is the information that appears on the calf passport. To avoid amendments, if unsure of the sex, please check before submitting.
-
Please note that if you have not entered a genetic dam (if ovum transplant was not used), the genetic dam field will default to the Dam ID. You do not need to do anything in relation to this.
-
-
-
To edit the calf details after they have been added to the table in Section 2, highlight the calf registration you wish to edit - the row highlights in yellow.
-
Click 'Edit' at the bottom of the table in Section 2.
-
The calf details are then presented back in Section 1. for you to edit.
-
Once edited, click ' add to list' for the calf registration to appear back in Section 2.
-
-
-
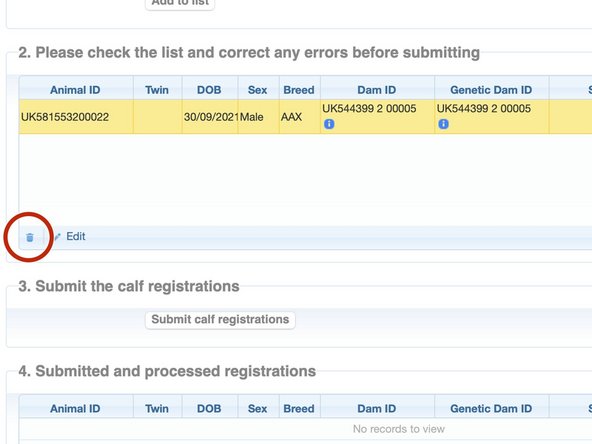
You can delete a registration row in section 2, before you have submitted, by selecting the row by clicking on it. The row highlights in yellow.
-
Click the dustbin icon in the bottom left of the table in section 2 and the row is deleted.
-
-
-
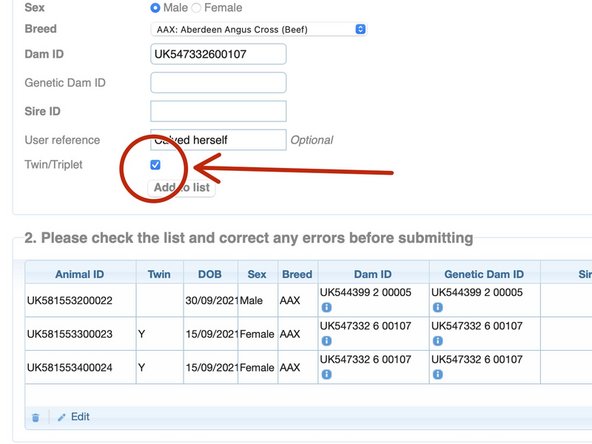
You have the option to register twins or triplets. Enter the details for each twin or the triplets and tick the twin/ triplet box.
-
This overrides the validation allowing the Dam ID of the mother to be used more than once.
-
If you require assistance to record multiple births please contact ScotEID.
-
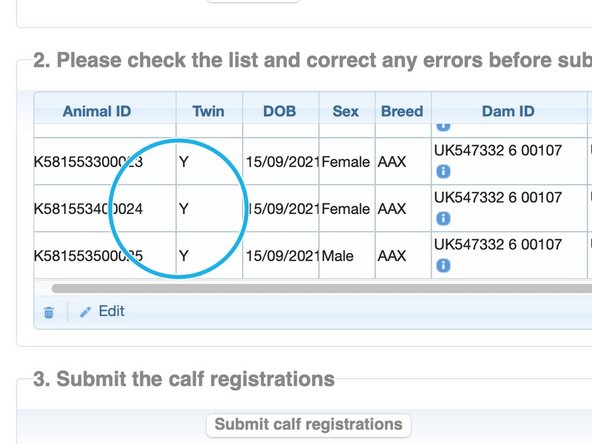
Once added to the list in Section 2, the multiple births appear with a Y in the 'Twin' column.
-
-
-
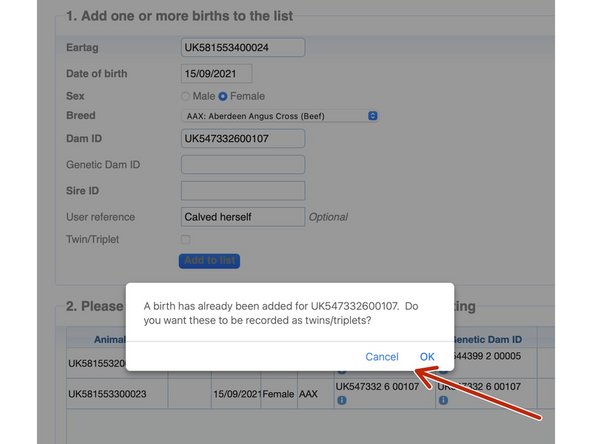
If you select the same Dam ID for a subsequent calf registration you get a warning message.
-
A birth has already been added for UK547332600107. Do you want these to be recorded as twins/triplets?
-
Your options are 'Cancel' to amend the Dam ID or 'OK' to record as a twin or triplet.
-
-
-
Once you have checked all the entries in Section 2 and you are confident they are accurate, please click 'Submit the calf registrations'.
-
The submitted calf registrations appear in Section 4, as processed. You have now completed the birth registration process and passports for these calves have been scheduled to print.
-
You should receive the passports within 10 days. If you don't, please contact us as soon as possible. If you are able to contact us within 6 weeks, there is no charge for the replacement passport. There is no charge if the fault is ours.
-
Processed calf registrations in Section 4.
-
-
-
To download the registrations you have submitted please click the paper icon in the bottom left of Section 4.
-
You can continue to add calf registrations and as you submit them, they all appear in Section 4 and you can download, if you require.
-
Once submitted, you can see your recorded births at 'View Births' and reflected in the cattle numbers and the recent activity summary on the ScotMoves+ home page.
-
'Where to view your births' guide
-
'ScotMoves+ home page' guide
-
-
-
There are two places where you can select to view the births on your holding:
-
1. On the left hand menu when you click on ScotMoves+ (Births/Deaths/Sales ...) and then select 'ScotMoves+ Births'
-
2. When on your ScotMoves+ Home page - available on clicking ScotMoves+ in the left hand menu, there is a box of quick links, the first of it is Births - View.
-
-
-
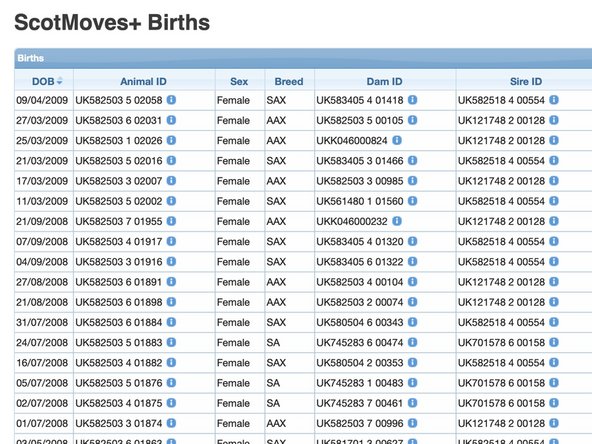
The ScotMoves+ Births page shows all the births that have been registered to your holding.
-
Date of Birth
-
Animal ID
-
Sex
-
Breed
-
Dam ID
-
Sire ID
-
-
-
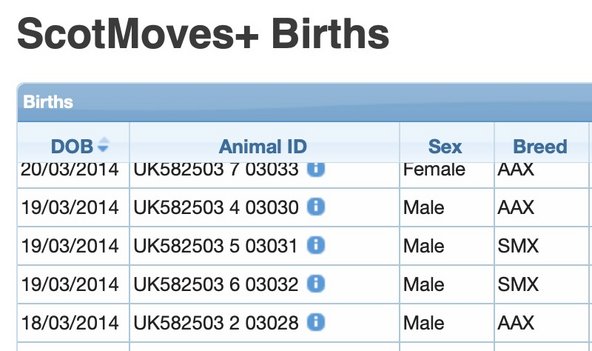
You can sort by each of the column heading by clicking on them.
-
-
-
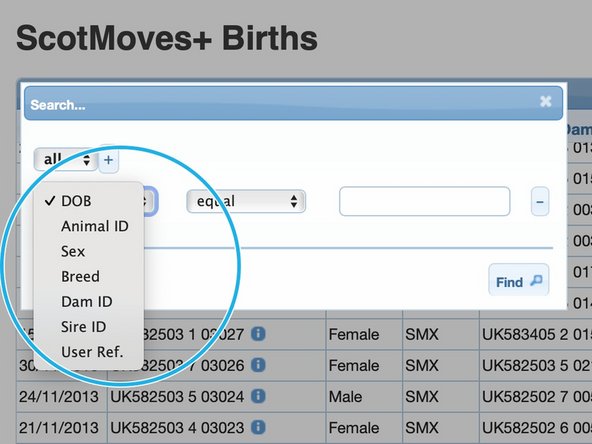
By clicking on the small spyglass icon in the bottom left of the table you get the search option box presented.
-
You can search one data field or more than one. For more information please see 'How to use the Search function on Tables'.
-
For example - you can select Animal ID from the dropdown of searchable fields and search for the details of a particular birth that occurred on your holding.
-
-
-
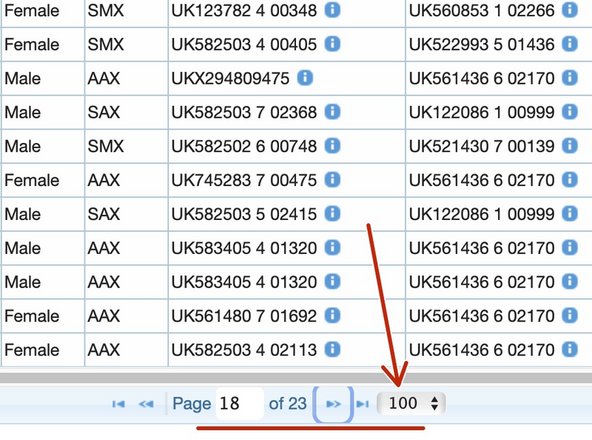
You can alter the number of births on a page by clicking on the number currently set.
-
You can use the blue arrows to page back and forth one page at a time or direct to the last page or back to the start.
-


If you require further assistance, please contact ScotEID on 01466 794323.
If you require further assistance, please contact ScotEID on 01466 794323.
